The Best Photography Editing Software for Beginners
Post-production workflows are part of a photographer’s 8-hour day. Beginners, owners of less capable cameras, are also tied to the editing table because their equipment and skills are still developing. Only, the table is actually a computer, and the editing tools are a software package. Shot on an SD card and slotted into their laptop, they’re about to transform a “meh” image into a perfectly polished photograph.
Have you ever felt like you were involved in your greatest shoot, your camera feeling like an extension of your arm, only to load up the digitally captured photographs later on and find out that they’re less than impressive? Photography editing software can be a real game-changer in situations like this. Even if the image is picture-perfect, maybe you’re the creative type, filled with the desire to reimagine photographs as works of art.
With the best photography editing software at your fingertips, you can quickly realize your artsy imaginings or confine yourself to a more grounded workflow, that of cropping and auto color balancing a picture that wasn’t shot on the best equipment.
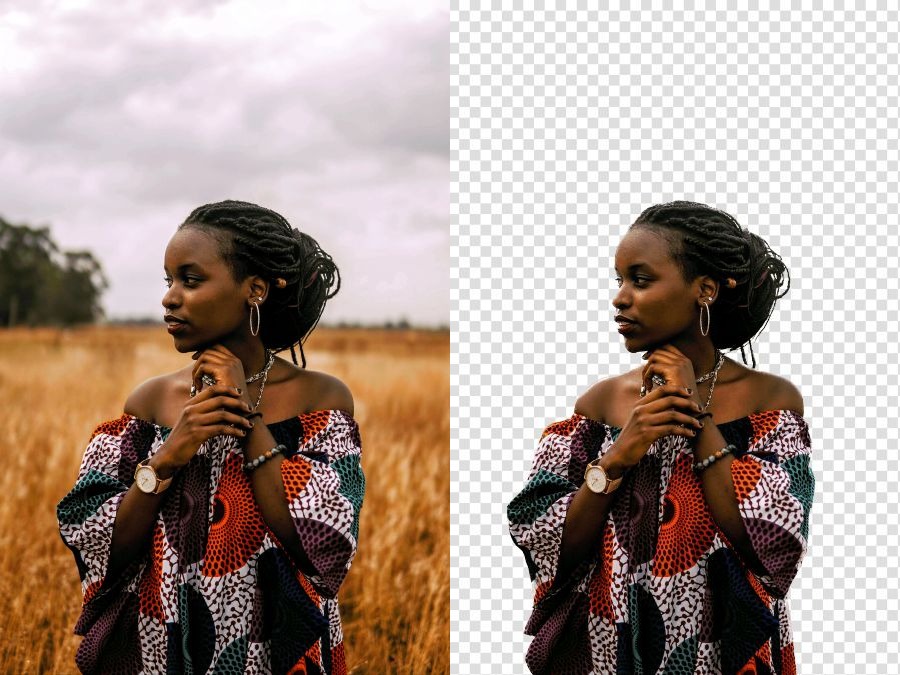
Background separation
A Photo Editing 101 Guide to level Up Your Photos
Every photographer was once a beginner. Every photographer also once owned a camera they didn’t know how to operate. If you find yourself in this position, your images are too dim because your aperture or shutter setting was off, there’s still a way to save the day. Using the best photography editing software for beginners, you’ll soon have your images popping with vibrant color and contrast.
While the most powerful graphic editing software on the market is and probably always will be Adobe Photoshop, there are a number of more affordable options, packages that have a gentler learning curve. Even their Lightroom software is a little too advanced for beginners; we know we can do better by you and find options that are easier to manage.

They’ll feature the editing tools you need and few, if any, of the advanced editing modes that can only be mastered by taking a two year online training course. We’re looking at you again, Adobe. Common camera mistake correction, image enhancing tools, color correction, sharpening, and way more besides, explore your creative side and develop a more technical post-production workflow by embracing one or more of the upcoming image editing software packages.
Adobe Photoshop Elements
As the title on the software website implies, Photoshop Elements is a stripped down version of their ever-popular image editing software, as used for years now by professional photographers, graphics designers, and digital artists. It’s recently become a subscription only service, but the Elements version is still available as a one-off purchase.
![]()
Photoshop Elements features many of the tools used in its big brother, so there’s always the option to graduate to the full package using the subscription service if you feel the need for more photo correction power. In that familiar user interface, you dive down as far as needed to reach the correct tool for your experience level.
We left our new staffer, a lowly intern, to edit some of the shots from one of our obsolete SD cards. He installed Photoshop Elements and slipped down to the first level of editing. It was here that one-click edits carried out automated tasks in quick succession. A boring sky was replaced with a more dramatic skyline. Marred skin textures on self-conscious subjects were smoothed while text was added on a curving guide line around their head.
Stuck on a washed out old photograph from a desert photoshoot that was shot on an old DSLR, our intern even used the built-in color matching tool and presets to introduce much-needed vibrancy. Selections adhered to the single click format, so fast selections of tricky foreground subjects weren’t hard to isolate. AI algorithms took on the burden of most of these tasks.

Two other levels of photographic editing power were available at the top of the menu. These were the Guided and Advanced modes. The split-screen “Before and After” picture buttons showcased here were particularly helpful, illustrating an edit before the editor made a commitment. On the right, just as useful, a section of user real-estate was reserved for creative filters, such as duotone and vignette, B&W and lens flare.

It’s a huge beginner photography editing software suite, yet it somehow retains ease-of-use handling. Layers are present, then there’s the photomerge tool for photographers who want to go big. If you’re into landscapes, photomerge uses seamless stitching to combine multiple images, creating superb panoramic shots. Object removal was another tool, cutting out unwanted elements, then there was the ability to call up a photo management window, which is what our intern needed to navigate the 200 images on that test SD card.
Photoshop Elements is available for MacOS and Windows computers. There’s also a mobile version, for those who prefer to edit on the move. Android and iOS. And let’s not forget the Camera RAW module, a feature that was imported from Photoshop into the Elements version.
Cyberlink PhotoDirector 365
Just like the entry level version of Photoshop, the next photography editing software product is full to the brim with AI powered tools. Generative image enhancements take control of background replacements and out-painting, of facial swaps and denoising, making artificial intelligence the heart of the software. Even so, you can take over at any moment, manipulating all of the editing with your own creative touch within the tool-heavy Cyberlink PhotoDirector 365 user interface.
The expected layer editing mode is evident, so expect to learn how to handle non-destructive editing via masking technology. It’s the same with algorithm-accelerated object selection, which automatically adapts to quickly identify people or animals. Take that selection and place it in a new scene or add text and graphic elements, perhaps to create a poster or website banner.
Still, it was hard for our intern to give up the AI features and continue with a deep dive into the finer editing capabilities of Photodirector. The prompt or reference image and prompt entry boxes were simply too entertaining for words. However, this could be a major stumbling block for those on metered internet connections, as the AI features are cloud-based. You’ll need a fast internet connection and a Cyberlink monthly subscription to keep generating all of that AI generated imagery.

As you’re researching the best photography editing software for beginners, the inclusion of artificial intelligence, or its exclusion, shouldn’t impact your workflow too heavily. You will need AI, though, for upscaling, deblur, and denoising. For generative fills and text prompts, AI won’t be available without a subscription. On the other hand, powerful auto color correction and auto contrast tools are accessible at all times.
Our visually oriented staffer found the image-based tool hints floating over common correction tools convenient. Photography biased photo effects were found under the blocky “Organize and Adjust” button, more dramatic image processing tools under the “Edit” button, and general photo correction buttons were clearly labeled a little further down. These included such common photography correction tools as Crop and Straighten, Auto Tone, and Image Resize. It’s all quite like Photoshop, except the various image correction settings are laid out in a more intuitive manner.
Available for Windows or MacOS, Cyberlink PhotoDirector has a website page filled with photography editing tools and modes. Camera user tools include DSLR & RAW format mode, slideshows, photo management, and color shift-informing soft proofing.
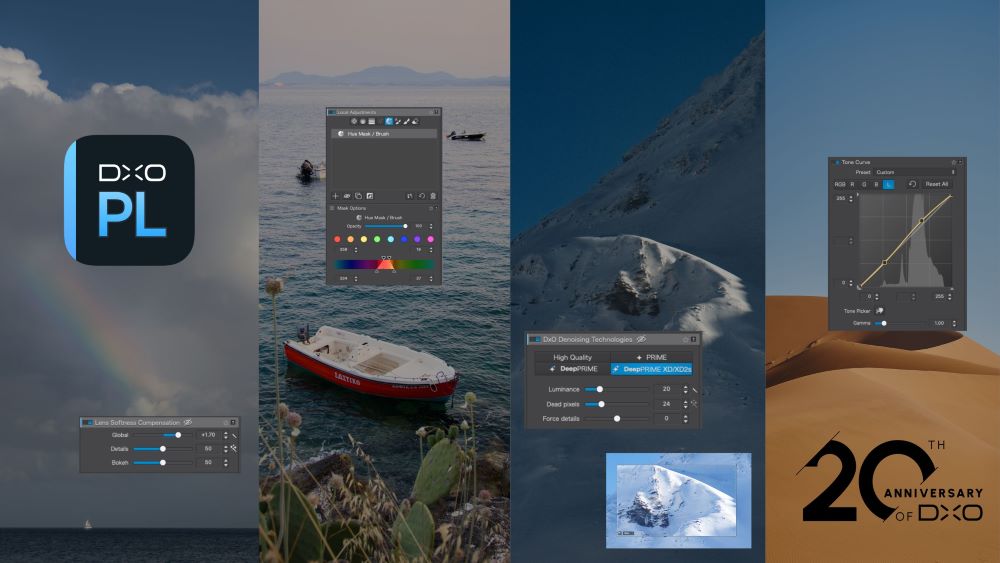
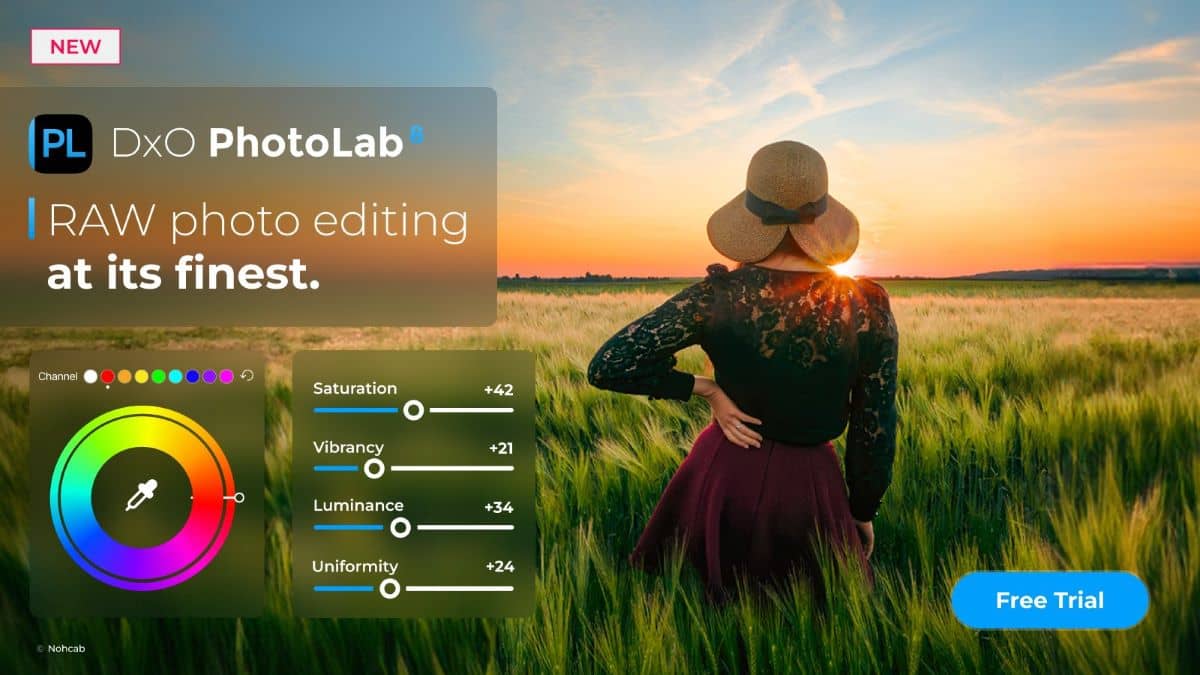
DxO PhotoLab 8
As a long-term partner for DSLR enthusiasts, Dx0 Photolab 8 had to be on this list somewhere. It is, in fact, the de facto RAW image editing software of choice for many photographers, professional or hobbyist, so it should fit in a beginner workflow remarkably well.
While the other options in this best photography editing software list for beginners are all excellent at doing pretty much every job, including selection-based object removal and AI image generation, Photolab is specifically designed to process RAW images.
Admittedly, not every point and shoot is RAW compatible. They’ll shoot JPEG or some compressed and lossy computer-accessible format that doesn’t store exposure data. DSLR cameras and their mirrorless cousins use uncompressed RAW formats, which work very well indeed with Dx0 Photolab 8.
Expect this beginner-friendly application to benefit newcomers who have more hard cash to spend. Beginners who have leapfrogged basic point and shoot models and gone straight for an entry-level DSLR have a lot to gain by purchasing this software and making it part of their RAW shoot workflow.
Similar to Camera Raw from Adobe, the software automatically updates camera and lens profiles, making it a breeze to enter lens distortion corrections via the Dx0 Optics Modules towards the right middle of the menu bar. Image presets are located on the same top menu, with eight B&W filters alone available to alter the mood of a RAW photograph. Other presets include Smartphone ISO noise correction and “Atmospheres.” They add such effects as London Fog and Heather Purple to your photographs.
Crops, side-by-side image comparisons, white balance color pickers, they’re all stored tidily in the clean interface, creating a full studio of photograph editing power. Likewise, you can minimize or maximize the various panels, pulling up metadata or histogram information so that you can evaluate each image correction before saving the final photograph to disk.
Dx0 Photolab 8 is available for Windows and MacOS. Spotted by our intern, it includes a Lightroom plugin, making it compatible with Adobe’s award-winning photography editing software.
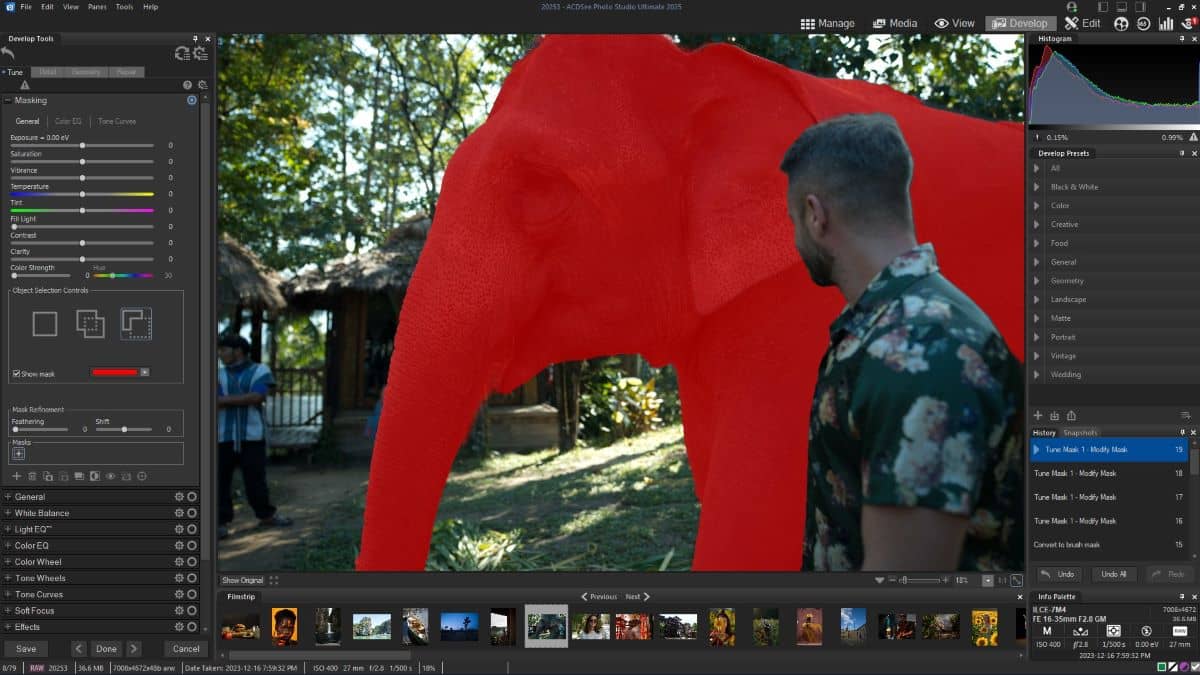
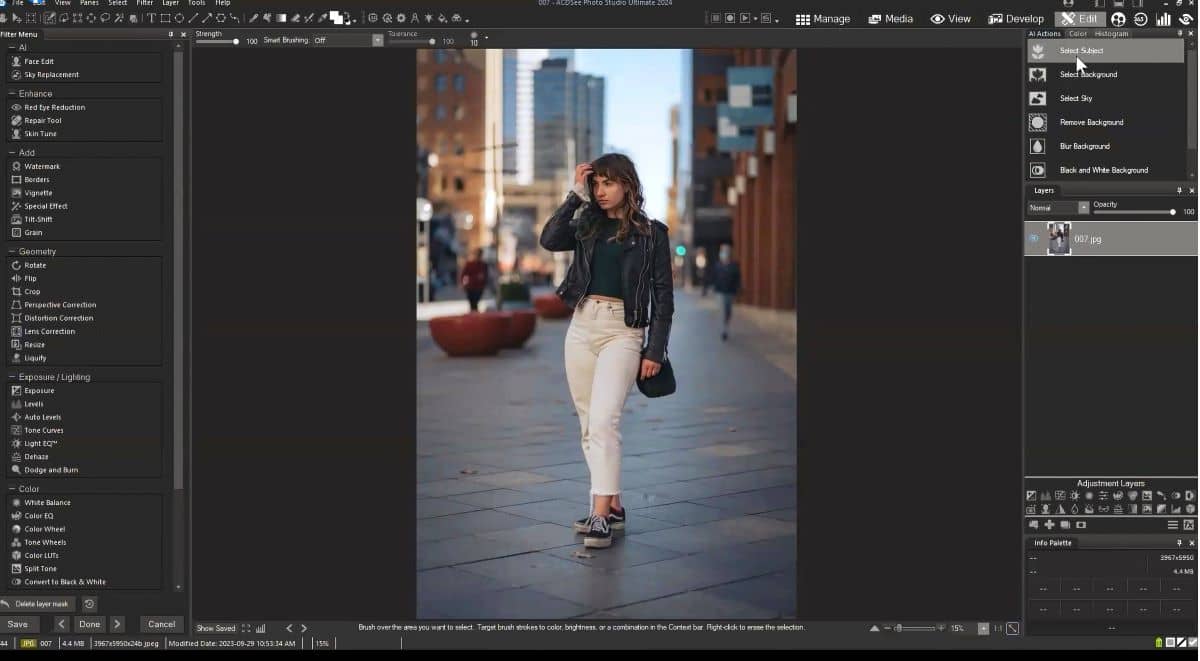
ACDSee Photo Studio
The grid interface feels reminiscent of both Lightroom and Dx0 Photolab, albeit on a smaller scale. Nonetheless, it’s a good software product to own if you’re starting your photography journey. The panels are organized in that same three column structure, with the central column occupying most of our desktop monitor. It’s filled with rows and columns of photograph thumbnails, although that display can be altered.

To the left, the file management menu and camera exposure data reside. That leaves the right panel, displaying metadata, IPTC tags, and search filters. It’s a standard layout, so if you do decide to start out with ACDSee Photo Studio, a bump up to Adobe Lightroom won’t be much of a shock. Having said that, Lightroom comes prepackaged with tons more lens and RAW data processing settings. All the same, boasting 700+ cameras as being supported by their camera RAW software, ACDSee Photo Studio isn’t a lightweight, either.
It’s on the surface that the software feels like a solid asset management program, but it expands to reveal more photographic strengths. AI supported super-resolution upscaling restores old photographs to pristine condition. Non-destructive layer masks and blending modes contend with a smart selection tool and channel filtering panels, creating a complete-package photography editing software option that rivals any other product on the market.
Playing to its strengths, Photo Studio is an asset managing marvel, and it has built on this foundation by incorporating facial recognition technology. Label all of the subjects in your photographs, and have them filtered and cross-referenced against different cameras and GPS information. Not necessarily a beginner feature, it’s certainly a tempting tool for those of us who are photography slobs, doomed to become disorganized without the integration of a workflow streamliner like Photo Studio.
The AI features seem to be inbuilt, so no cloud services are necessary. On the downside, that might mean buying a desktop computer with a beefy GPU and plenty of VRAM, too. Available for Windows and MacOS, file management seems to be the priority, but this asset management muscle conceals a very capable photography editing workspace.
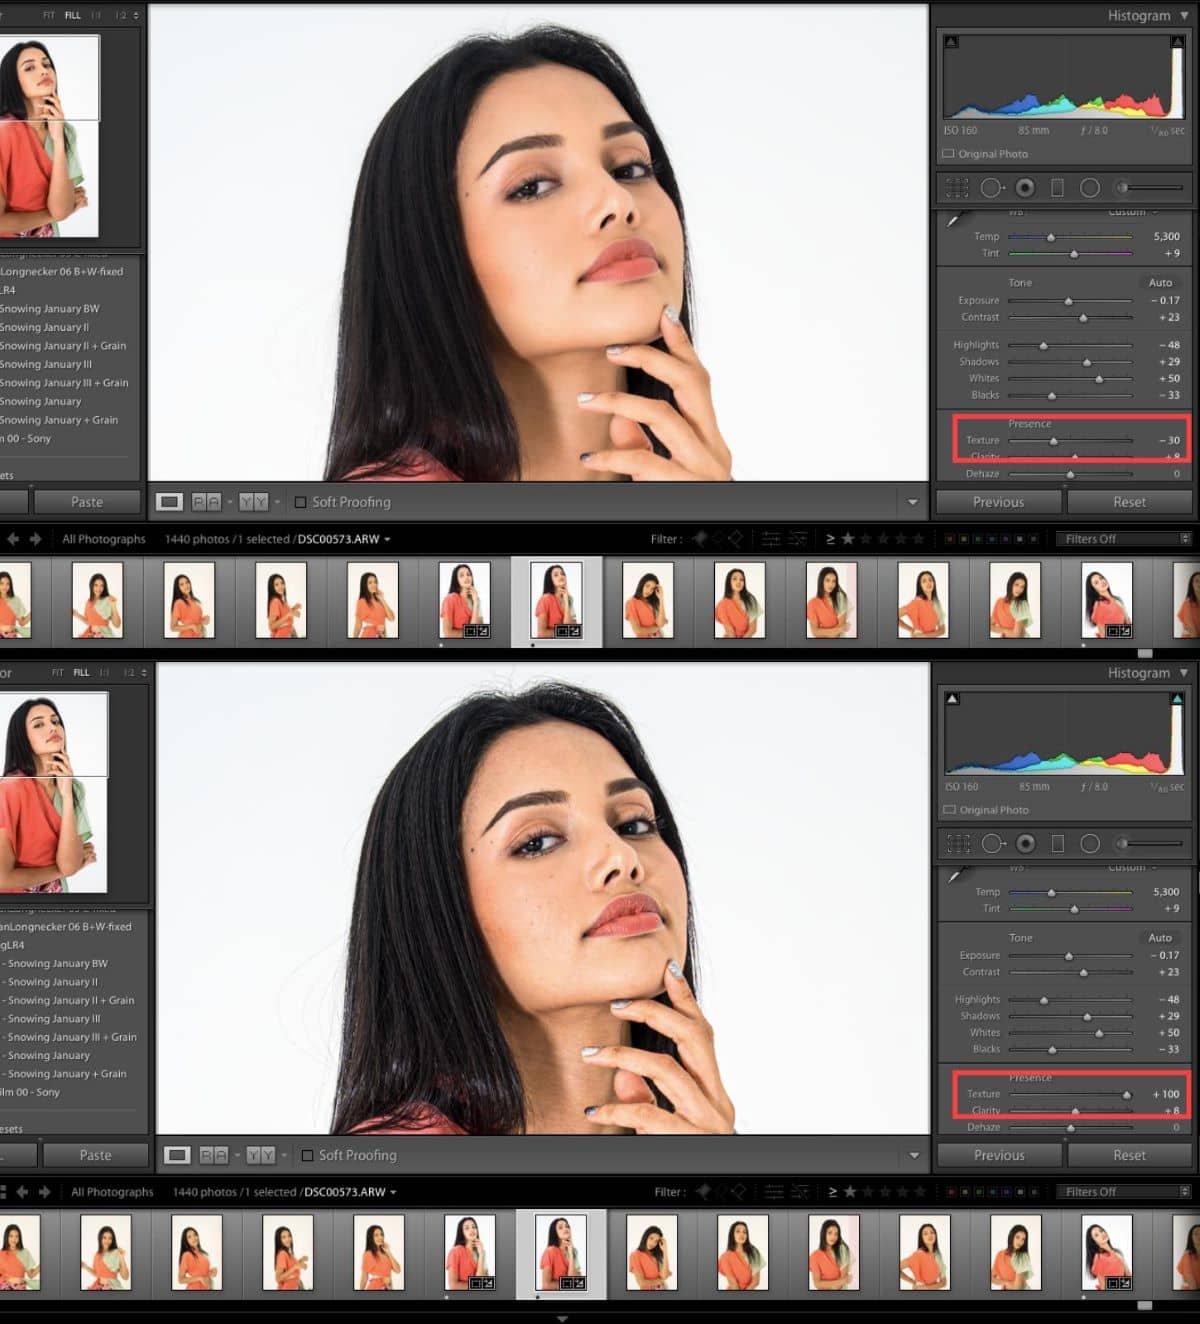
Adobe Lightroom Classic
There was a lot of time stalling and putting off putting Adobe Lightroom in the hands of our new staffer. That’s because the program is as easy or as hard to pick up as it needs to be when diving into its various modules. Using presets and fundamental exposure controls, you flatten the learning curve somewhat. Then, if you feel your confidence growing, you can drop the guided editing features and work solely within the RAW image processing module.
![]()
Accepting that it’s beginner-friendly but scalable, with room to grow when delving into professional photography territory, Adobe Lightroom is the culmination of years of photographic technology, all densely wedged into a simple interface. The popular three-column interface is utilized again, this time in shades of gray. Shortcut keys are heavily relied upon to streamline photographer workflows. To the left of the grid, you have Folder, Collection, and Catalog. Import and organize from here.
The center of the grid is filled with thumbnails, the right side has the histogram and camera metadata, and the lowest panel runs from left to right as a narrow filmstrip panel. This entire screen is the library module. Other modules in a typical workflow include Develop, Book, and Slideshow. As you can probably guess, Develop is the important one.

Back with our beginner staffer, the Develop module holds all of the exposure presets, like Sepia and Retro, Landscape and Vintage. A nudge and a hint later, our chosen editor used the preset dropdown arrow to run through the various Retro filters. As the mouse pointer paused over each one, a live preview in the central window was generated. Vibrancy, saturation, red eye color correction, all of these and more were found in Develop.
It’s all deceptively easy. A RAW image, once clicked upon, will open the Camera Raw panel, where further editing can be done to draw out shadows and highlights, but this is taking us away from beginner functionality, into more advanced DSLR and mirrorless photograph editing. Apart from that, though, there’s a handful of media-specific panels. Books, slideshows and print/web, they all have their own module entries.
Available for Windows and MacOS as part of an Adobe photography cloud subscription plan, Lightroom Classic is the standalone version. There’s also Lightroom, a cloud only version that can be purchased on its own. An ipad app is also available on the Apple Store.
Pixelmator Pro
![]()
The editing of JPEGs and PNGs is found standard in just about every image editor. What tends to set photography editing software apart from those basic products is the ability to load and manipulate RAW photographs. Pixelmator Pro, only for Macs, passes that test, and it does so with a bias towards simple editing.
As with a lot of Apple device displays, we fell instantly in lust with the Pixelmator Pro way of previewing image editing changes. A vertical slider could be “pulled” across the entire frame of a photograph under the editing eye. The original composition was to one side, but as the slider was pulled further and further to one side, editing alterations could be previewed. Color adjustments were also generated in small thumbnails, showcasing the actual image, then there was a white balance histogram below, showing whether the picture leaned towards a red, green, or blue tone.
![]()
Everything is perfectly framed in the graphical interface, and the standard grid view, thumbnails and camera metadata everywhere, has been avoided in favor of a more minimalist layout. Also, more in line with photography terminology, words like Temperature and Tone are preferred, as warmer temperatures look more red while cooler temps are bluer. On the final darkened vertical bar to the right, all other editing tools are neatly assembled.
Cropping, color adjustments, contrast and brightness, all the way to B&W filters and sepia, they’re all compactly hosted without causing any onscreen tool crowding. All that’s left to say is, yes, this is a Mac only app, one that’s been packed with 750 cameras of photographic data. It sharpens, adds grain, and even applies custom LUTs (Look Up Tables), color profiles that can be applied to an image to achieve a specific look or style.
![]()
User-friendly to the extreme, Pixelmator Pro is one of the best looking photography editors around, but it’s perhaps not as capable as Lightroom Classic, and it’s certainly not as fun or as user guided as Photoshop Elements.
Cracking the Grid VS. Gallery Workflow
The biggest immediate difference between these five candidates for best photography editing software for beginners is the grid layout. ACDSee opens to this layout, Lightroom Classic uses it to the best effect, and Dx0 Photo Lab 8 has PhotoLibrary, yet another twist on the same theme. Most of these applications can be customized into a filmstrip, though, and there’s usually an option to compare picture A against B. Pixelmator Pro puts a nice spin on this latter idea, using the slider to smoothly compare before and after editing changes.
Actual editing workflows are divided even further. Photoshop Elements and PhotoDirector are both fond of guided one-touch edits, but there’s the option to manually take control of the changes. Even if one button pushes are rejected, there’s typically a guide mode or tool explanation balloons to help beginners put their best foot forward. The only thing that didn’t impress our young staffer was the subscription services, but it’s not like these can be avoided if the software relies heavily on cloud-based artificial intelligence. ACDSee actually does include local AI processing, but then you’re looking at a computer with a powerful GPU, which isn’t something every beginner has access to.
Newcomers to our field probably invest all of their money in a decent camera. This means cloud-based AI is more likely, which in turn signals the need for some kind of subscription. Either that or you avoid AI for the moment; it’s still a technology that’s very much under development. Ultimately, we suggest balance and the option to scale. That balance should be in the form of good asset management and a powerful suite of editing tools. Photoshop Elements has the beginner-friendly layout and asset management, as does ACDSee and Cyberlink PhotoDirector. Pixelmator Pro, meanwhile, is uniquely Mac- centric, while Adobe Lightroom Classic is, by far, the most scalable, built for professionals but capable of gradually educating beginner photographers in the ways of photography editing.
It’s hard to go wrong with any of these editors, and there are others, like the freely available GIMP. It does have an unpolished interface, and customer support is likely to be found on message boards, but there’s RAW image processing in there somewhere. Otherwise, for non AI users, Adobe Lightroom Classic is a tempting proposition, for sure.